Welp, I haven't been so good at the whole "Blog once a week" New Year Goal. But, to be honest, I haven't had much inspiration in the writing department. So maybe we'll have to play that goal by ear.
In other news, I come bearing a new tutorial! I had found something on Pinterest ages ago about decorating ceramic mugs with Sharpies. Unfortunately, I didn't actually pin it and cannot find the original. So, here is my own version.
I am a big fan of two current design trends: confetti dots and arrows. Allow me to explain:
 |
| Kate Spade Dinnerware via |
 |
| "gotcha" arrows via |
I mean what's not to love, right? So, I found a couple of white, ceramic pieces at Target, and decided to spruce them up a bit.
 |
| Cappuccino Mug = $3.99 Dip Bowl = $1.99 |
I had these Sharpie pens on hand. The Sharpie mini is a navy color. The metallic silver and gold pens are actually Sharpie paint pens (who knew?) and they work wonders. The Sharpie mini was given to me, and the paint pens were purchased at Hobby Lobby.
I simply drew on my own dots to achieve this Kate Spade inspired confetti look.
And this cute little bowl serves as a new home for paper clips and thumb tacts.
And here is where it lives!
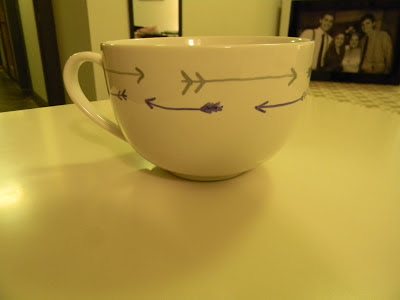
I used arrows to adorn the upper half of my new mug.
After completion, place the ceramic pieces in the oven on 350 for about 20 minutes to make the design permanent. It's as easy as that! How perfect for personlized gifts or home accents? And the whole thing took less than 30 minutes from start to finish!
Here is the finished product! I am so pleased with my new little items. Can't wait to try this little trick again soon. Spoiler alert - these may be the type of gift I give for a long time.
Happy MLK Jr. Day!
-JD


No comments:
Post a Comment